Sometimes you find yourself in a situation, where you need to change the assigned Region or Vnet on a VM in Azure.
There is a very simple and fast way of achieving this.
By deleting the server, and assigning the same virtual disk to a new VM connected to the correct Vnet.
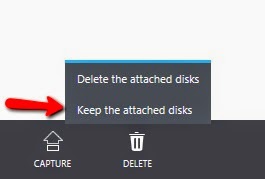
Go to the Virtual Machine in Azure management portal and Delete the server ! – Important to know that when you delete the VM – it will ask you if you want to keep the virtual disk, then the actual virtual disk will be available even after the VM is deleted.
Select Yes, and note the following dialog.
Now you wait 2-3 minutes for the change to replicate, and the you simply click “NEW” and select “From Gallery” click “My Disks” and here you will find the Virtual disk from the deleted server.
On the next screen you will have to create a new “cloud service” in order to select the new VNet or Region – IF you wish to reuse the name for the Cloud Service, the old one has to be deleted prior to creating the “new” VM
And thats it, your VM is now connected to the new Vnet og Region.


