- Understand Opportunistic TLS and Email Encryption: A Deep Dive into S/MIME, Purview Message Encryption, and Secure Email.
- Boosting Email Security with SMTP DANE and DNSSEC: A Complete Guide
Introduction to SMTP DANE and DNSSEC
Securing email communication is critical in the modern digital landscape. SMTP DANE (DNS-based Authentication of Named Entities) and DNSSEC (Domain Name System Security Extensions) are two technologies that strengthen email security by protecting against DNS-based attacks and ensuring encrypted connections between mail servers.
What is DNSSEC?
DNSSEC enhances the traditional DNS system by adding digital signatures to DNS records. These signatures allow DNS resolvers to verify the authenticity and integrity of responses, protecting against attacks like DNS spoofing and cache poisoning. DNSSEC ensures that DNS queries return unaltered, trustworthy data.
What is SMTP DANE?
SMTP DANE builds on DNSSEC by ensuring secure and authenticated SMTP connections. It uses TLSA (Transport Layer Security Authentication) records to signal a domain’s support for encryption and publish its security policies. With DANE, mail servers can authenticate each other, reducing the risk of MITM (Man-in-the-middle) and downgrade attacks.
For this article i will assume you have your email hosted in M365 – where Microsoft are responsible for the TLSA record – otherwise if not, please read here on how to setup you own TLSA records:
https://learn.microsoft.com/en-us/purview/how-smtp-dane-works#what-are-the-components-of-dane
Verifying Your Domain’s Configuration
- Use the DNSSEC Debugger (verisignlabs.com).
- Enter your domain name.
- Confirm that all checks show green marks, indicating proper DNSSEC configuration.

The Role of DNSSEC in Securing Email
- Prevents DNS Spoofing:
DNSSEC prevents attackers from redirecting users to malicious servers by ensuring DNS responses are accurate and unaltered. - Enables Secure Exchange Online Communication:
DNSSEC-validated DANE records help Exchange Online establish secure SMTP connections. This ensures emails are delivered to the correct servers without tampering.
How SMTP DANE Works
Defined in RFC 7672, SMTP DANE relies on TLSA records published in DNS zones. These records confirm TLS support and communicate the domain’s DANE policies. If no TLSA record is present, SMTP continues without DANE verification. When enabled, DANE provides:
- Strong Authentication: Mail servers validate receiving servers using TLSA records.
- Protection Against MITM Attacks: Ensures encrypted communication between mail servers.
- DNSSEC Integration: Verifies that DNS records are secure and untampered.
Configuring SMTP DANE and DNSSEC in Microsoft 365
Step 1: Enable DNSSEC
Run the following command in PowerShell:
Enable-DnssecForVerifiedDomain -DomainName <DomainName>
Step 2: Update MX Records
- Retrieve the
DnssecMxValue. - Create a new MX record with the value at your DNS registrar.
- TTL: Lowest allowed value (no less than 30 seconds).
- Priority: 20 (to avoid interfering with existing MX records).
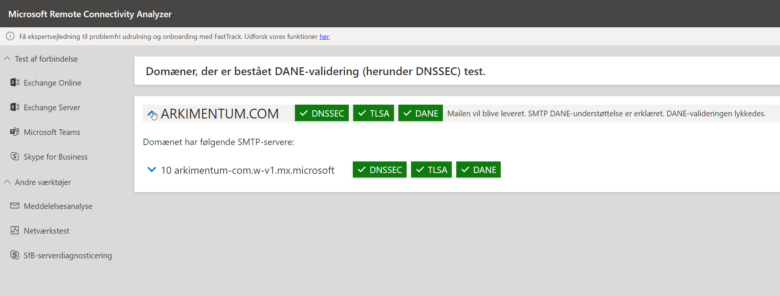
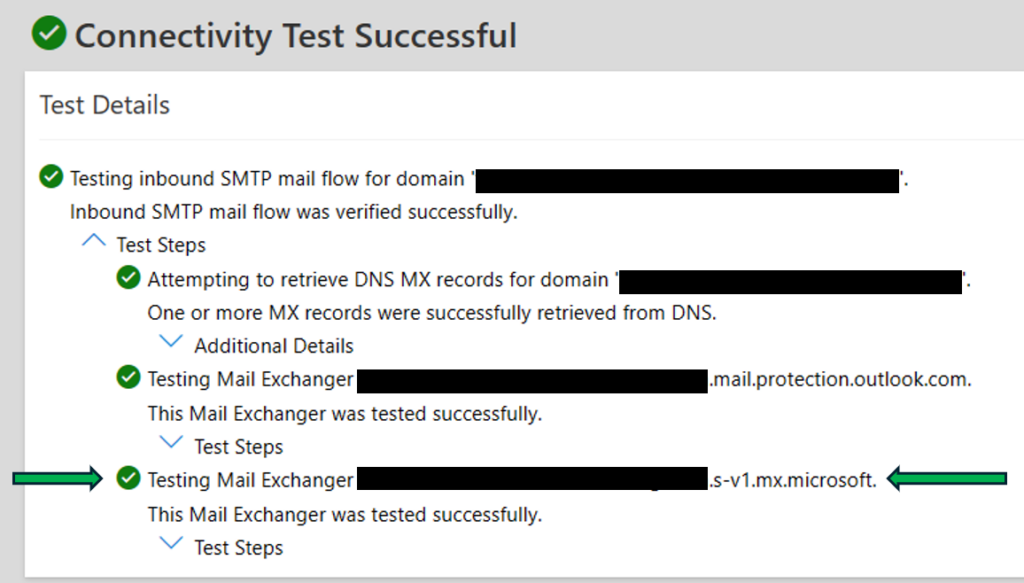
Step 3: Test the Configuration
Use the Microsoft Connectivity Analyzer to verify the settings. Expand the Test Steps section to confirm the mail exchanger ending in mx.microsoft passes the DNSSEC validation.
Step 4: Finalize MX Records
- Delete old MX records.
- Update the new MX record priority to
0.
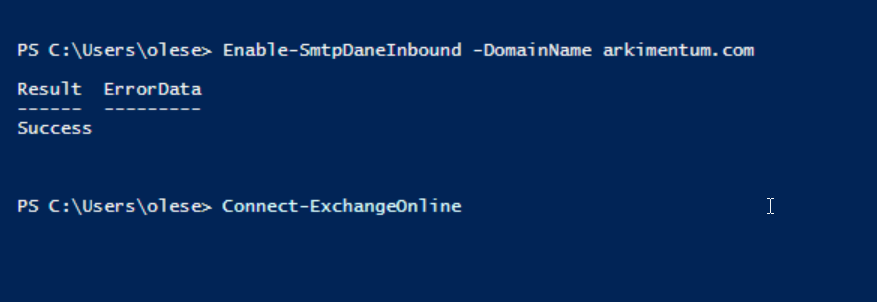
Step 5: Enable SMTP DANE
Run the following PowerShell command:
Enable-SmtpDaneInbound -DomainName <DomainName>
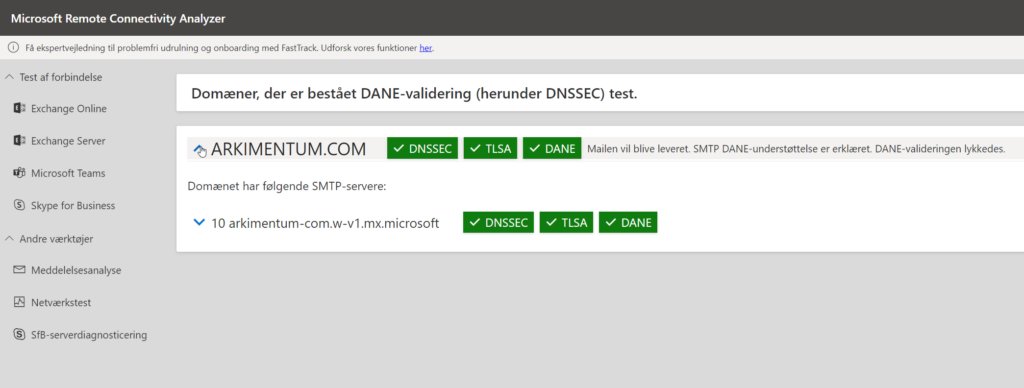
Wait 5-15 minutes for TLSA propagation, then re-run the analyzer to confirm a successful configuration.
The result should look something like this
Benefits of SMTP DANE and DNSSEC
- Improves Trust in Email Communication:
Authenticates mail servers, ensuring trusted, encrypted exchanges. - Prevents Phishing and Spoofing:
Blocks spoofed DNS records and fraudulent certificates, reducing phishing risks.
Conclusion
Implementing SMTP DANE and DNSSEC in Microsoft 365 significantly strengthens email security. These technologies ensure authenticated, encrypted communication while protecting against DNS-based attacks. By adopting DNSSEC and DANE, organizations can secure their emails against current and future threats, making them indispensable for robust email security.
Start enhancing your email security today—your organization’s data and reputation depend on it!
