Hello – and thanks for stopping by
Last week at Ignite in Chicago I attended the excellent session by Scott Stubbersfield, where he did the TV-kitchen version af a LYNC > SKYPE migration – meaning that the servers were precooked, in order to do the session in 75 minutes. Thats great – and we all knew from the pre-release material that upgrading a pool will take alot of time, anything from 30 minutes to several hours pr FE server.
Last week at Ignite in Chicago I attended the excellent session by Scott Stubbersfield, where he did the TV-kitchen version af a LYNC > SKYPE migration – meaning that the servers were precooked, in order to do the session in 75 minutes. Thats great – and we all knew from the pre-release material that upgrading a pool will take alot of time, anything from 30 minutes to several hours pr FE server.
So i was with great anticipation I prepared and migrated the first real LYNC server at a customer site.
And i must say so far so good – everything running smooth and as expected
I needed a hotfix on one Front-End:
kb2982006
But apart from that it ran perfectly – the part “uninstalling roles” Took exactly 85 minutes – so dont panic if your Front End seems to hang in the process – also note at the button of the upgrade window the current component is displayed.
And i got me another cup of mocca.
Done after app 4 hours – on a single server standard edition pool – with all roles configured.
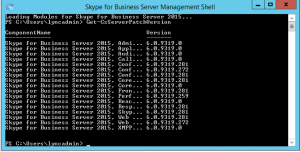
Then i just ran the start-cspool cmdlet and wathc the routing group placement taking place, remember to run the SfB management shell as administrator – and after that everything worked as planned – brilliant.
I will not do a complete step by step guide, rather link to one done by my friend and colleague J. Dissing, he is really doing a great series on this.
http://exchangepro.dk/2015/05/02/how-to-upgrade-to-skype-for-business-2015-part-1/
But in short.
Get the topology builder up and running on a new machine, either dedicated mgmt server or just any PC – install from the SKYPE for Business iso.
Then upgrade the pool in topology builder and publish
Then temporarily shutdown the pool by using the disable-cscomputer -scorch command, this is to prevent that services start by themself after reboot if you only used stop-cswindowsservice !
Then start setup on the servers in the pool one by one – obviously before disabling the pool either get a service window OR move the users to a temporary pool while upgrading – NOTE on that, if you choose side by side migration and create additional pool remember to move the CMS role before disabling the 2013 pool.
So my final point is – get on with it – upgrade, get the benefit of full SKYPE integration, serverside conversationhistory and all the fancy new reporting capabilities for call quality monitoring to name a few. 🙂


